Thursday 12 November 2015

candle making!!!

Today's the end of my twenty days of Dasara holidays and I want to reflect upon how  usefully I spent it.
So in terms with this blog, I did some DIY room decor and most importantly candle making! Hopefully I'll cover the room decor some other time, with all the others I promised myself *internal cringe.
Back to candle making! it's so cool, making your own candles and I know it sounds lame but it's really interesting. An aunt of mine started this whole business and when I saw the amazing candles she made, I just had to try it myself. so I went to the craft store, brought the minimum materials and improvised! and they were just as good. I think this when I mention that I LOVE YOUTUBE!!!
Really there's nothing that you can't find!
So the candles came out great and what's more is that I found more DIY decor that I'd love to post on this blog, if only the vacations lasted longer. What!? Twenty days is nothing ,when there are lots of books to be read, lots of movies to be seen and so little time left. :P


hundered + for a tutorial!!! like comment and share! if you want more !

Thursday 9 April 2015

phoenix acrylic attempt!

So lately I've been trying out acrylic paint that I had left over from my face painting venture (don't ask, long story!)
Anyways using acrylic is like really harder than using poster or even water colours I think. And that is because it dries very quickly. On the other hand it can be a positive aspect as you can easily paint over any mistakes on the canvas. :) so I guess it really depends on how you look at it.
I really like the acrylic experience as it requires you to become a machine? I think? I mean I work like I'm on overdrive, dabbing at paint, cleaning my brush and most of all trying to blend the colours before it dries off. Practices and lots of  it will eventually make it easier or so I hope.

 I've always liked the phoenix of all mythical creatures (thanks to dumbledore :) ) and a fast search on Google made me find the most amazing of all phoenixes, but it was a digital painting. I searched YouTube for tutorials in vain. They didn't have a tutorial for acrylic but I did find a really beautiful tutorial using paint pen thingies, which I don't own.
And thus begins the tale of my trial and error painting of a phoenix that I must admit isn't that bad right? so here it is the final thing after all the over painting or painting overs, should I say.
drum roll please!!!!!!!

so comment share or like to let me know how much you guys like it!

Saturday 28 March 2015

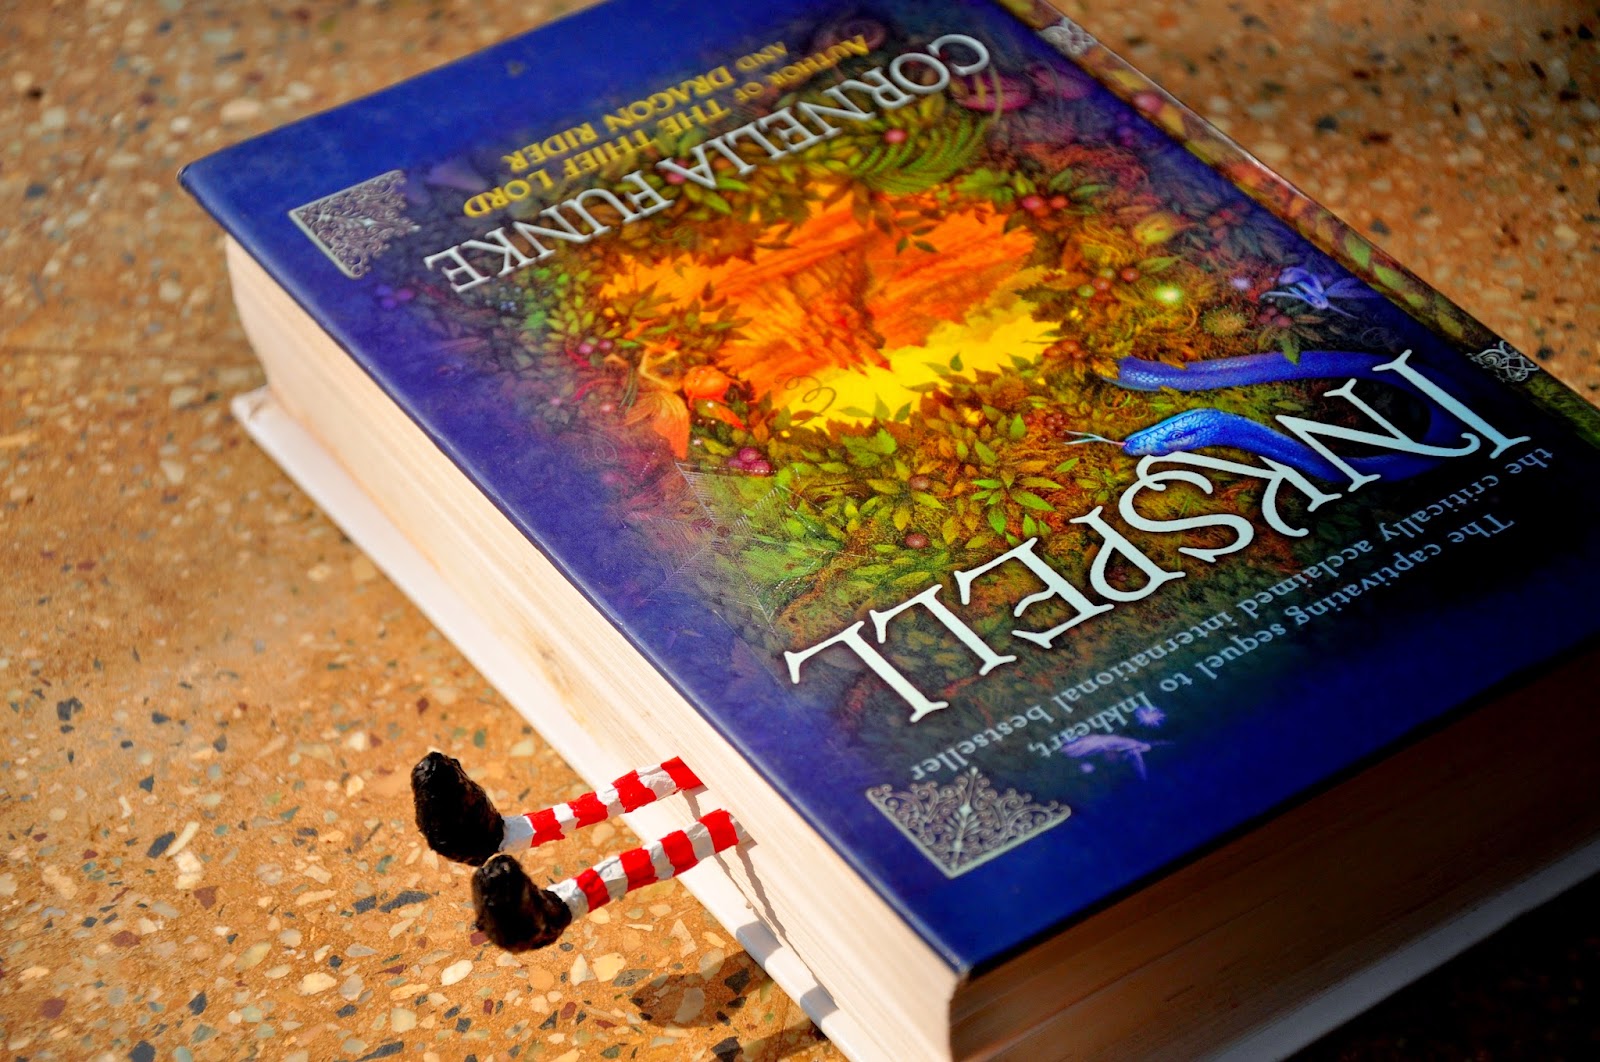
feet book marks!!!

I obviously don’t know what "coming soon" is right? But on my defense' I had my exams going on and I couldn't possibly find the time to make a tutorial. For those of you who think this a tutorial for the previous post on corner book marks, I'm sorry to disappoint you. But look on the bright side! A new post!
OK, so I was scrolling down the internet when I saw some cute book marks of little feet peeking out from the book but, like I'd pay for bookmarks! Nope. So I decided to make em' myself.
I was really excited and forgot to take pictures of each step and I only realized it this morning when I started painting it. Too late! Yeah that's what I thought. so here I am posting the final finished bookmarks. (I've made too many promises of posts already so let's just hope I'll make one of this too?)


But just in case I don’t follow through. Here are the steps in words.( that's the best I can do right now).
1.       Take two paper clips the metal ones will do just fine. and then open them to form a L shape where one side is much longer than the other.
2.       Here comes the sticky part. Take tissues and wrap them around the feet and make a ball like structure on the smaller side for the shoes.
3.       Let it dry.
4.       Paint on it. I made black shoes with socks with red stripes. (as you can 'clearly' see.)
5.       Paste both the legs a little apart on a small piece of stiff paper. Then fill the gap between the legs on the paper with more pieces of stiff paper. And finally paste over the mess you've made. (Make sense?)
6.       Let the glue dry and we're done!
Lets just hope I do make a step by step pic tutorial (even I find it difficult to understand me).

So till we meet again! ta ta (technically we have never meet. right? it would be so cool if we met and didn't even know) so alright! 

Thursday 15 January 2015

Corner book marks!!!

Its been a long time since I've posted anything in this blog.I had a lot of things going on but here is something I've been working on.looking forward on making  a tutorial on it soon. Hope you like it
a monster corner book mark,the idea is from a video from "do it gurl "on YouTube. jamie  always has
the greatest ideas ,you can find beautiful diy ideas there.
hope you liked it!!! tutorials coming soon!

Wednesday 14 January 2015

3D ORIGAMI!!!

recently my school held an origami contest , in which i participated.
here is what i made,


https://www.youtube.com/user/razcapapercraft

Saturday 20 April 2013

HOW TO MAKE A GLASS PAINTING ( BUTTERFLY)


you'll need :-


  • glass paint design
  • glass
  • glass out-liners
  • glass paint (i;m using water based colors)

first keep the glass over the design and with the out-liner draw over the design.


let the liner dry for about 25-30 mins and then start filling the design with the colors.
 using colors of different shades alternately makes the painting make beautiful .


pop air bubbles with a pin.
and here's the finished painting.
for more details watch the video @ http://www.youtube.com/watch?v=L8iQAyQO0GE
the glass paint design is from http://crafts.123peppy.com/how-to-make-a-butterfly-glass-painting/190